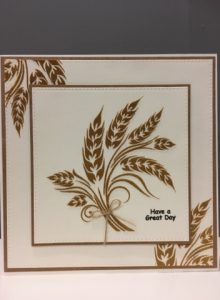
Project – Glass Micro bead Wheat card – by Lucy Ellis
Kit List:
- SP1-239 – Sweet Poppy Stencil: Wheat
- SPSTMP_FAM – Sweet Poppy Stencil: A6 Stamp Life is a Journey
- SPSD-GOLD – Stencil Dimensions: Gold
- SP-SPREADER – Sweet Poppy:Spreader
- A5 Magnetic sheet – A5 Magnetic sheet
- Sweet Poppy – Stencil Tape Low Tack 25mm x 25m
- Sweet Poppy Ultra fine coloured glass microbeads
- Gold –Sweet Poppy Ultra Fine Glass Microbeads: Gold
- Bronze – Sweet Poppy Ultra Fine Glass Microbeads: Bronze
- Brown – Sweet Poppy Ultra Fine Glass Microbeads: Brown
- 300 gsm Cream & Kraft card stock cut to sizes advised
- 1 – 8×8 Cream card blank
- Vesafine black ink
- garden twine
Step 1: Lets now cut the card to produce so we can cover the wheat with glass micro beads. With your pieces of Cream and Brown Kraft card stock cut to the following square sizes either with a Square Die or a guillotine/trimmer. ( the Cream on the sample I have cut with the Sue Wilson Nobel Square
- Cream cardstock – 1 x 14cm x 14cm
- Kraft cardstock – 1 x 14.5cm x 14.5cm
- Cream cardstock – 1 x 18.5cm x 18.5cm
- Kraft cardstock – 1 x 19.5cm x 19.5cm
Step 2:
Take a 1/4 tsp of each of the micro beads and mix together to make a warm mix put to one side in a large A4 tray for sprinkling over later.
Step 3:
Lay your Cream (14cm x 14cm) on top of the magnetic sheet and place the wheat stencil over it secure down with Stencil tape. Spread your Gold Stencil Dimensions medium over the top and remove the stencil, place the dirty stencil and tools into warm water to clean at the end.
Step 4:
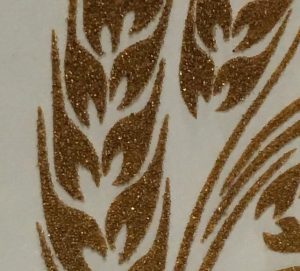
Place your wet wheat image into the A4 tray and sprinkle your coloured micro bead mix over the top ensuring you cover all the wet areas, place the image to one side to dry
Step 5:
Take your Cream (18.5cm x 18.5cm) and repeat steps 2 & 4 on the corners of the card stock and again place to one side to dry.

Step 6:
On your main Cream topper take your stamp (Have a great Day) and stamp in the area you wish I have stamped on the bottom left to balance the card out.
Step 7:
Mat and Layer your card stock onto your 8 x 8 Cream card blank with either with tape, wet glue or 3D glue/tape to suit your taste.
Step 8:
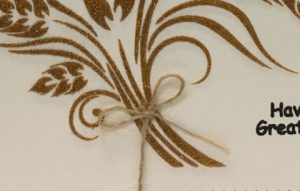
With a little brown garden twine I have tied a bow and attached with 3D glue.

Your project is complete !
Top Tips:
- Remember always use a Magnetic sheet when using metal stencils because this will help provide a closer bond with the stencil to card stock.
- Clean your stencil with warm soapy water and a nail brush this gets into all the small areas and avoids cutting fingers.
I hope you enjoyed this project please feel free to leave a comment or share with friends!
Lucy
Sweet Poppy Stencils

