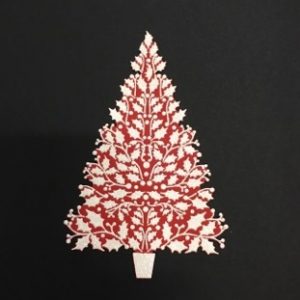
Project – Holly Tree Easel Christmas card – by Lucy Ellis
Kit List:
- SP1-291 Sweet Poppy Stencil: Holly Tree
- SPD-117 Sweet Poppy Buddy Die: Holly Tree outline die
- SPSTMP_BLESS – Sweet Poppy Stencil: A5 Stamp Set Christmas Blessings
- SPSD-GWHITE – Stencil Dimensions: Glossy White
- SP-SPREADER – Sweet Poppy:Spreader
- A5 Magnetic sheet – A5 Magnetic sheet
- Sweet Poppy Low tack Stencil tape – Stencil Tape Low Tack 25mm x 25m
- Sweet Poppy Satin Chrystalina Glitter – Sweet Poppy Stencil: Satin Glitters Chrystalina Rainbow
- Red & White card stock cut to sizes advised
- 1 – 5 x 7 White card blank
- Red tiny gems
- Vesafine black ink
- 3mm red ribbon
Step 1:
Lets begin with cutting our card stock to make this elegant Holly Tree Christmas card. With your pieces of White & Red card stock cut to the following sizes with a guillotine/trimmer,
- 5 x 7 White card blank trim to 13.5 x 21cm
- Red card stock – 12.5cm x 20cm – this is for the stencil topper to be pasted
- Red card stock – 1 x 12.5cm x 16.5cm – this is the internal layer
- White card stock – 1 x 13.5cm x 21cm
- Red card stock – 1 x 12.5cm x 20cm
- White card stock – 1 x 11.5 x 18.5cm
- Red card stock – 1 x 10.5cm x 17.5cm
- White card stock – 6cm x 11.5cm – (for the sentiment)
- Red card stock – 5.5cm x 11cm – (for the sentiment)
- White card stock – 4.5cm x 10.5cm – (for the sentiment)
Step 2:
Lay your Red card stock (12.5cm x 20cm) on top of the magnetic sheet and place the Holly Tree stencil on top secure down with Stencil tape and then spread your Glossy White Stencil Dimensions medium over the top of the stencil, remove the stencil and sprinkle the Chrystalina Rainbow glitter over the top tap off and put the wet topper to one side to air dry completely.


Place the dirty stencil and tools into warm water to clean at the end.
Step 3:
Cut your Landscape 5 x 7 base card to size (13.5cm x 21cm) then on one side trim off 4cm and on the side that is left longest score down the middle and and fold in half this will create your easel.


Step 4:
Take the card base and on the inside matt the red card stock that you have cut ensure you use the Red card stock that is cut to size 12.5cm x 16.5cm, this needs to go on the inside on the unscored side of the card base.
Step 5:
Matt and layer the rest of the red & white card stock starting with the largest white 13.5cm x 21cm and going up in smaller increment sized card stock. Before you stick these to the card base ensure you only apply tape or glue to only the bottom half of the back of the white 13.5cm x 21cm card and then stick this onto the front face of the scored side of the card this will then allow you to put the card into an easel card (Ensure you do not put tape/adhesive on the whole of the matted topper as this will not fold. on the front of the card) … it is your choice if you 3D layers or have them flat.
Step 6:
Take the white 4.5cm x 10.5cm card stock and stamp your sentiment, I have used one of the sentiments from our A5 Christmas Blessings stamp set – “Sending you warm Christmas wishes across the miles” … once dry mat and layer this on the sentiment cut card stock and place on the inside of the card base approx 1 cm from the right edge use 3D foam tape so it makes a ledge to allow the easel to stand.
Step 7:
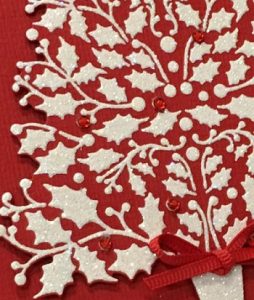
Once the glittered image is dry brush off the residue glitter from the Holly stenciled image and then lay the die over the top, spend a little extra time ensuring the die is lined up before cutting it. Once die cut put a sprinkle of tiny adhesive gems on some of the dots and with your 3mm ribbon tie a bow and apply with glue near the tree base, put 3D foam to the back of the die cut and place to one side.


Step 8: To finish apply the die cut topper Holly Tree with 3D foam tape onto the front of the matted layers and place a little red gem in each corner to add that finishing touch …

Your Holly Tree Christmas card is complete !
Top Tips:
- Always use a Magnetic sheet when using metal stencils because this will help provide a closer bond with the stencil to card stock.
- Start your medium on the tape and not the stencil then apply in one sweep. The more you work it the worse the image so apply once and remove excess once.
- Clean your stencil with warm soapy water and a nail brush. This avoids cutting your fingers but gets into all the small areas.
I hope you enjoyed this project please feel free to leave a comment or share with friends!
Lucy

